fashion
So, have you decided to dive into the beautiful world of flower arrangement? That's fantastic! Whether for your home, a special event, or a fun hobby, arranging flowers is therapeutic and rewarding. The array of choices might seem overwhelming if you're starting. But fret not! Here are beginner-friendly techniques that will have you arranging flowers like a pro in no time.
1. The Grid Technique
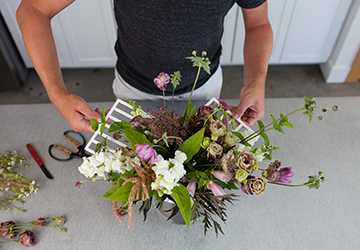
Imagine a tic-tac-toe grid. Now, picture placing your flowers within those squares. That's the grid technique for you! It's a straightforward method, ideal for beginners. Start with a shallow vase or a container with a wide opening. Use clear floral tape to create a grid over the vase's mouth. This grid provides a framework to insert your flowers, ensuring they stay in place and don't fall over.

Once your grid is ready, begin with your foliage or greenery. Fill in the corners and the centre first; t, creating a balanced base for your arrangement. Next, add your focal flowers. These are the standout blooms that catch the eye. Finish off with some filler flowers or smaller blooms to fill any gaps and add texture. And voila! You've got yourself a beautiful, grid-based arrangement.
2. The Dome Technique
The dome technique is about creating a rounded, dome-like shape with your flowers. It's elegant and looks great on tables or as a centrepiece. Start with a narrower container at the bottom and wider at the top, like a classic vase. Begin by placing your most giant flowers in the centre, forming the highest point of your dome.
Gradually work your way outward, adding smaller flowers and foliage. Create a gradual incline from the highest point to the edges to achieve a cohesive and rounded look for your arrangement. Remember to turn your vase as you work, ensuring an even distribution of flowers. Once you're satisfied with the shape, fill in gaps with smaller blooms or greenery. The result? A stunning flower dome is sure to leave a deep impression on people.
3. The Triangular Technique
As the name suggests, the triangular technique revolves around creating a triangular shape with your flowers. This classic favourite technique offers a balanced and visually appealing arrangement. Begin by selecting three focal flowers. These will form the points of your triangle.
Place the first flower in the centre, slightly higher than the rest. Next, position the other two flowers on either side, forming a triangle. Once your focal flowers are in place, fill the gaps with smaller blooms and foliage. The key is maintaining the triangular shape while ensuring a harmonious flow of colours and textures. The result is a timeless arrangement that's both elegant and balanced.
4. The Layered Technique
The layered technique is all about depth and dimension. Instead of arranging flowers in a single plane, you'll create layers, adding depth and visual interest to your arrangement. Start with a base layer of foliage or greenery, ensuring it covers the entire base of your container.
Next, add your focal flowers, positioning them slightly above the base layer; this creates the first layer of depth. Continue to layer your flowers, using varying heights and textures. The goal is to create a multi-dimensional arrangement rich in depth and detail.
5. The Hand-Tied Technique
Last but not least, we have the hand-tied technique. This technique doesn't require a vase or container; the flowers are held together in your hand and tied with floral tape or twine. It's a popular choice for bouquets and arrangements that must be carried or gifted.
6. The Crescent Technique
The crescent technique is inspired by the shape of a crescent moon, creating a graceful, flowing arrangement perfect for long tables or mantels. Start with a shallow, elongated container. Begin by placing your foliage or greenery along the length of the container, creating a curved base.

Next, add your focal flowers, positioning them to follow the natural curve of the arrangement. The tallest blooms should be at the centre, gradually tapering toward the ends. Complete any empty spaces with smaller flowers and fragile blossoms. The result is a beautiful, crescent-shaped, unique, and eye-catching arrangement.
7. The Parallel Technique
The parallel technique involves arranging flowers and foliage in parallel lines, creating a structured and contemporary look. Choose a rectangular or square container for this style. Begin by placing your foliage or greenery along the length of the container, creating a base layer.
Traditional floral arrangements are perfect for sleek and stylish spaces.
8. The Hogarth's Curve Technique
This method, derived from the 18th-century artist William Hogarth, is founded on his renowned theory of the 'line of beauty' or 'S-curve.'The arrangement features a graceful, flowing curve that adds movement and dynamism to the design. Start with a tall, slender vase or container.
9. The Ikebana Technique
Originating from Japan, Ikebana is the art of Japanese flower arrangement, emphasizing minimalism and harmony. Unlike traditional Western arrangements, Ikebana uses negative space and the natural lines and shapes of the flowers and branches.
10. The Garden Style Technique
The look and feel of a lush, vibrant garden inspires the garden-style technique. It's a free-form and organic approach, allowing the flowers and foliage to guide the arrangement. Start with a wide, open container with plenty of space for your blooms to breathe.
Conclusion
Flower arranging is a delightful blend of art and creativity. With these beginner-friendly techniques, you're well on your way to creating stunning floral arrangements that will brighten any space. Roll up your sleeves, pick your favourite flowers, and let your creativity bloom!

